So you say your jewelry needs a home? Read on my well accessorized friend, read on.
This week’s project is quick and easy, anyone can do it, and (hint!hint! fellas) it’s a great surprise project that will make your significant other giddy with joy! Imagine the look on your loved one’s face when they come home to find what you’ve made for them!
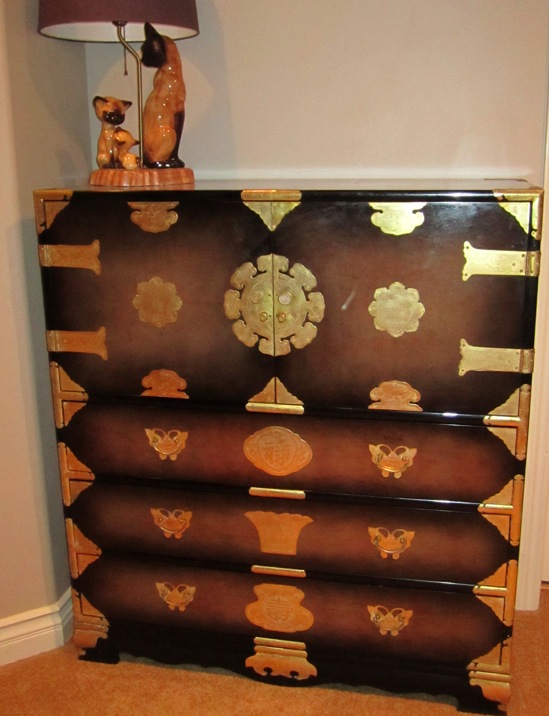
Do you have too much bling for a small jewelry box, but want something a little more unique than those mass produced jewelry cabinets? By using a piece of furniture you already own, or finding an inexpensive one second-hand, you can have something much better, for much less!
Over the years I have accumulated jewelry. Most of it from yard sales. I thin the crop from time to time, but I find that with jewelry, you just never know when you’re going to need that one quirky necklace, that classic cuff bracelet or those Ren and Stimpy shrinky dink earrings (IT COULD HAPPEN! I MIGHT WEAR THEM AGAIN!) As I have an affinity for vintage jewelry (and have a more difficult time discarding the vintage pieces) my collection needs a home.
We’ve all had experience with attempting to make jewelry storage work in a small box or drawer. It doesn’t. But does this mean we’re doomed to a lifetime of untangling necklaces which have seemingly fused together in one giant mass, or searching in futility for the mate to your favorite earring?

Fear not! All of your jewelry storage issues can be solved in an afternoon!
Here is a step by step on how to make it happen:
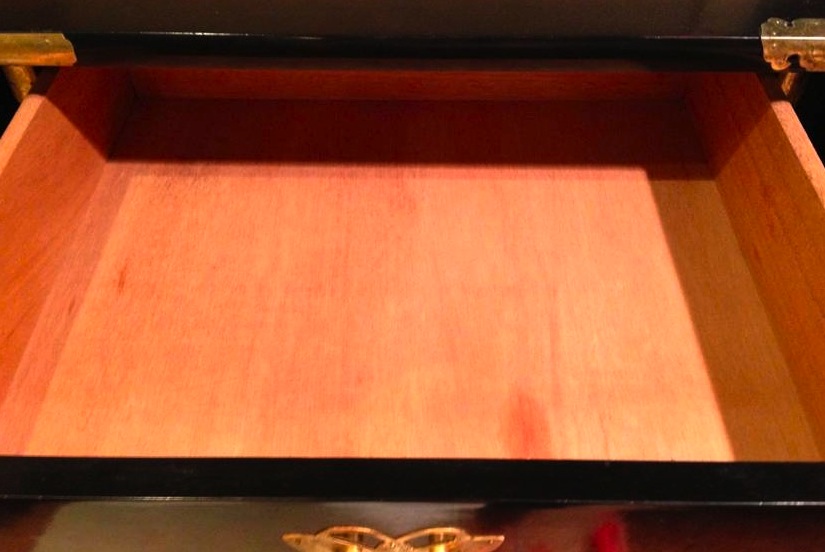
Step 1. Measure the inside of the cabinet, drawer or drawers you plan to convert.
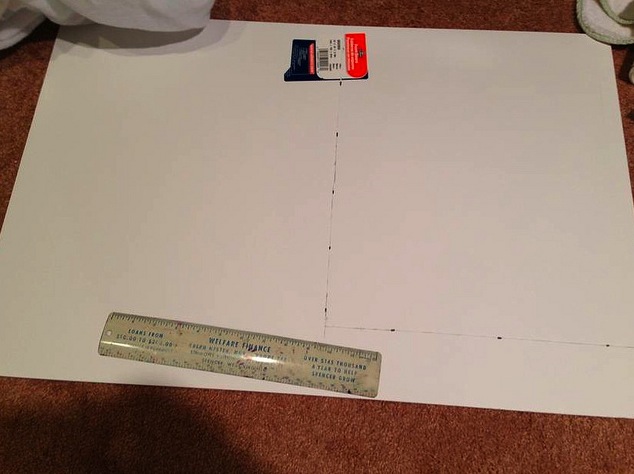
Step 2. Cut foam core (it’s a bit like poster board, only thicker. It has a layer of, you guessed it, foam, in between the layers of thick paper) to the size of the drawer. The size should be pretty darn close to the size of the drawer. You can go a SMIDGE smaller to allow room for the fabric and batting, but I kept mine within ¼ of an inch.
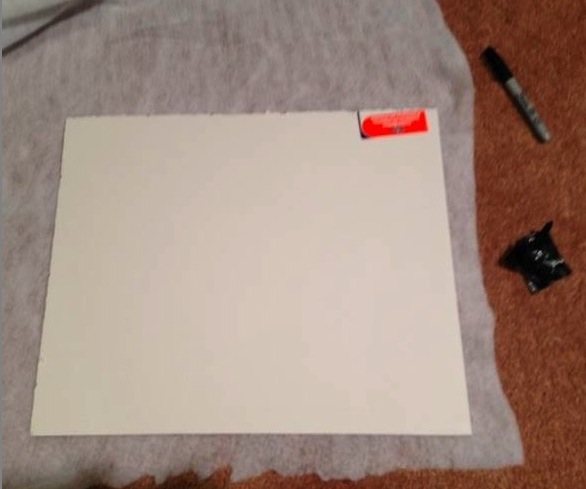
Step 3. Lay foam core on top of batting. Cut batting about 1 ½” wider on all four sides than the piece of foam core.
Sidenote: In case you’re wondering no, step 2b. was not “have a glass of wine or three”…my pictures just didn’t turn out so well. Apologies for the blurry ones above and below! ![]()
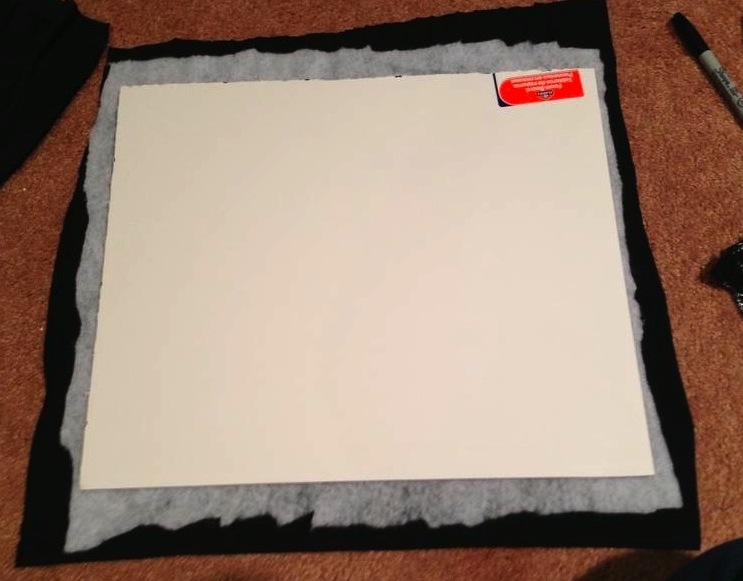
Step 3. Do the same with the stretch velvet, cutting the velvet just a little wider than the batting.
Side note: The back of these pieces are not visible at all once they are installed, so I didn’t even try to do a neat job when I was cutting the batting. My scissors were old and dull and it all looks like a hot mess…, but don’t fret, it doesn’t matter one whit once it’s all in place.
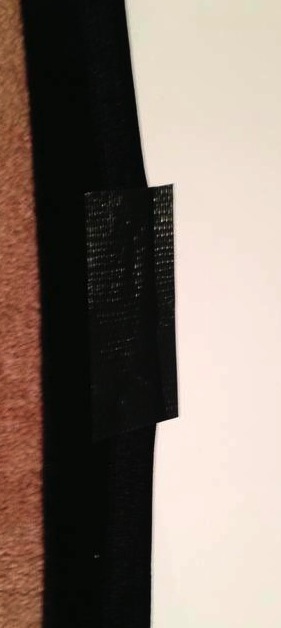
Step 4. Begin taping first the batting and then the velvet to the back of the foam core. I have tried this with other projects and duct tape works best, as long as one is not worried about the back of the project looking “clean.” I have used glue, staples and other forms of tape. None were as effective. If it matters to you how the backside of the foam core looks, you can cover it with black felt after you finish. Start with one good sized piece on the center of each side. It doesn’t stay in place super easily at first. It’s more manageable if you enlist the help of a willing friend, or an unwilling teenager who would rather be watching John Green videos on youtube. Your helping hand can then hold the fabric in place while you tape, or vice-versa.
It is important to pull the batting and fabric taut, but not too taut, or it makes it even more difficult for the tape to hold both in place. It’s not an exact science. You’ll figure it out as you go along. 🙂
Step 5. Continue taping the batting as if duct tape grows on trees, next, tape the fabric as well, until it is completely covered. Then put several additional layers of tape over what you’ve already done, in order to secure it in place. On the corners, pull it towards the center, forming a pleat and tape like crazy. Watch as it slips out of place. Swear. Tape again. Invent new swear words. Tape yet again. When you have effectively depleted the duct tape rainforest to such a degree that Pete Seeger is knocking around some ideas for a song about you, add one more layer, and then rest.

Once you’re ready to “hammer out” the remainder of the project, move on to the next step:
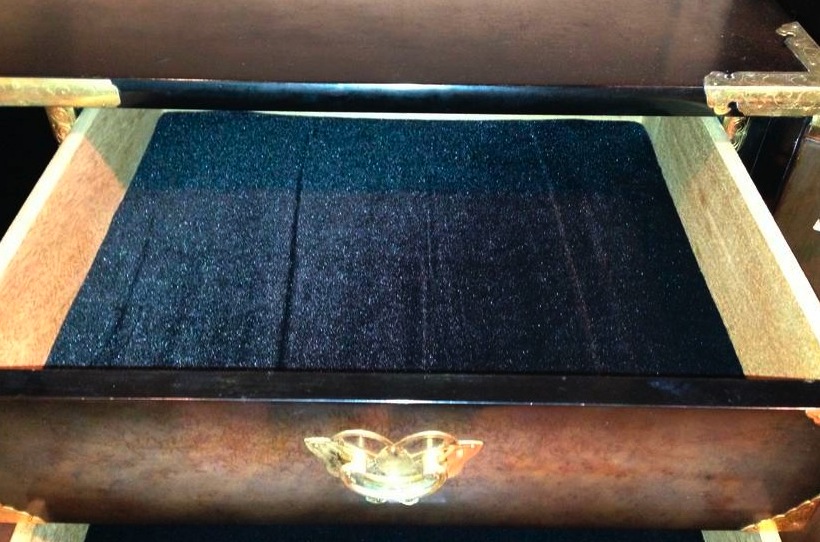
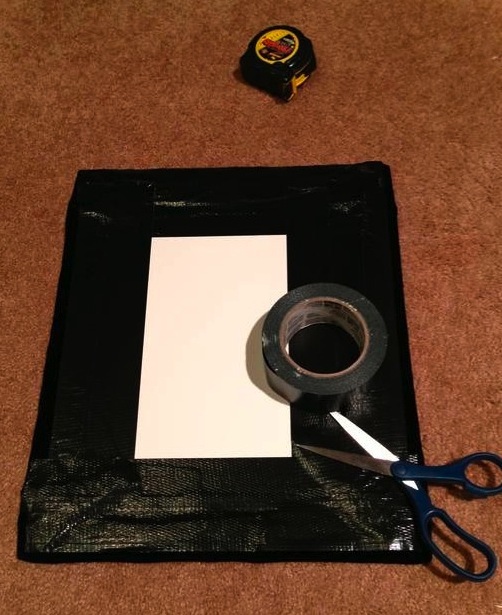
Step 6. Place in drawer. If you did it just right it should be just a little tight. That way it won’t slide around inside the drawer. My pictures aren’t too great…it looks as if the fabric is wrinkled, but I’m not sure why…I think the flash picking up the nap of the fabric. The stretch velvet actually stayed wrinkle free.
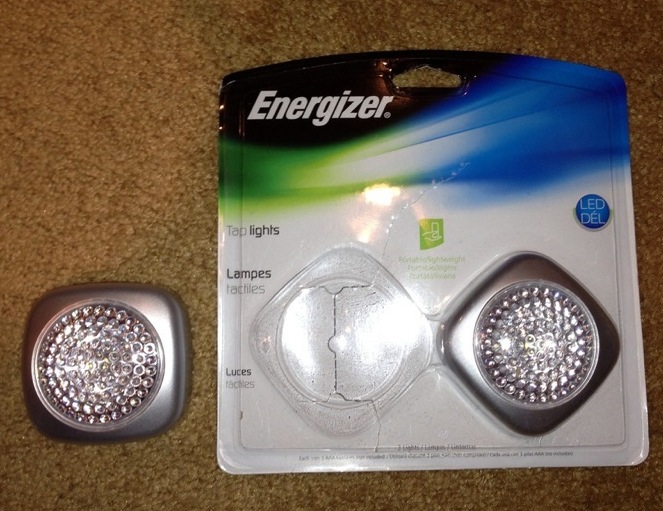
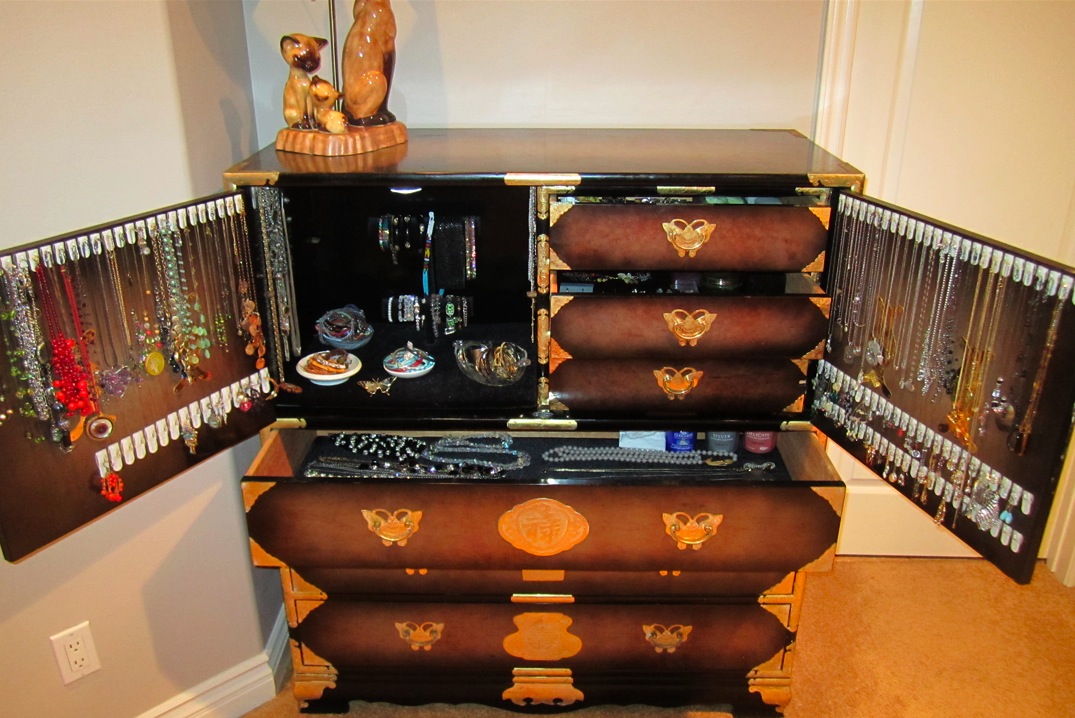
Step 7. For the left hand side of my cabinet, which was an open space rather than drawers, I added LED tap lighting. It would have been fine without, but it was a little dark, and not only that, but the lights made things sparkle and look pretty. These amounted to a decent portion of my budget for this project, around seven dollars at Target for two, but in the end, I think it was worth it. They install easily with double sided foam tape (included.)
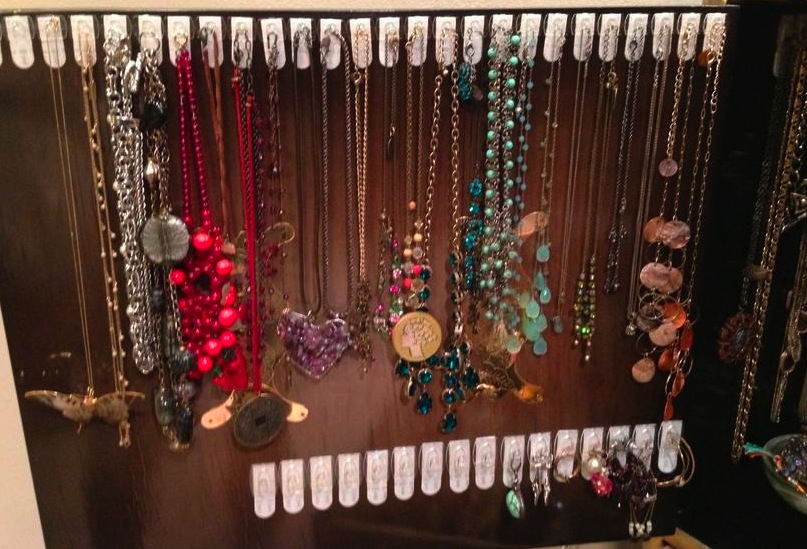
Next I added hooks to the inside of the cabinet doors and to the inside of the open cabinet compartment. Because this was a reasonably decent piece of furniture, I used Contact brand adhesive hooks, which won’t damage surfaces. I had an old pine armoire years ago that I used for a similar purpose and used chrome screw in cup hooks. I actually prefer the look of the cup hooks AND they hold larger items more comfortably. Whenever I attempt a project such as this one I always try to allow room to grow. In this instance I added more hooks than I need right now.
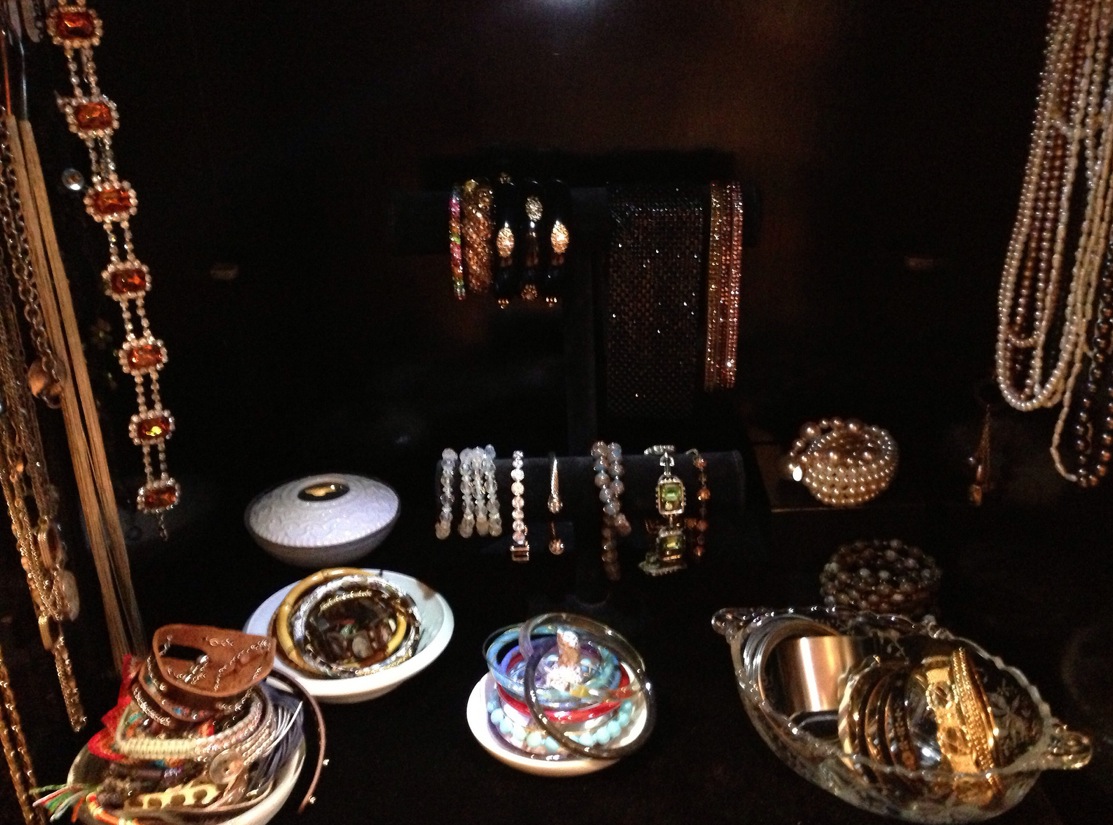
For the interior of the cabinet, in addition to hooks and the tap light, I added another black velvet liner for the “floor”, a black velvet jewelry display for necklaces and bracelets, and I also used some decorative dishes for storing extra bracelets. I found my velvet jewelry display stand at a yard sale for a dollar, but they’re not priced out of reach even at full retail. They are available in a few different styles and sizes at JoAnn Fabric and Craft stores for between 2.99 and 29.99, are frequently on sale and JoAnn also offers a weekly 40% off coupon for one item.
Here is a link to the JoAnn website showing the display stands:
http://www.joann.com/search/_velvet%20jewelry%20stand/
Here is a link to their coupon page. There is almost ALWAYS a 40% off coupon. I used mine for my fabric:
You can also get the JoAnn app for your smartphone. This way you always have the coupon on hand and don’t need the weekly flier.
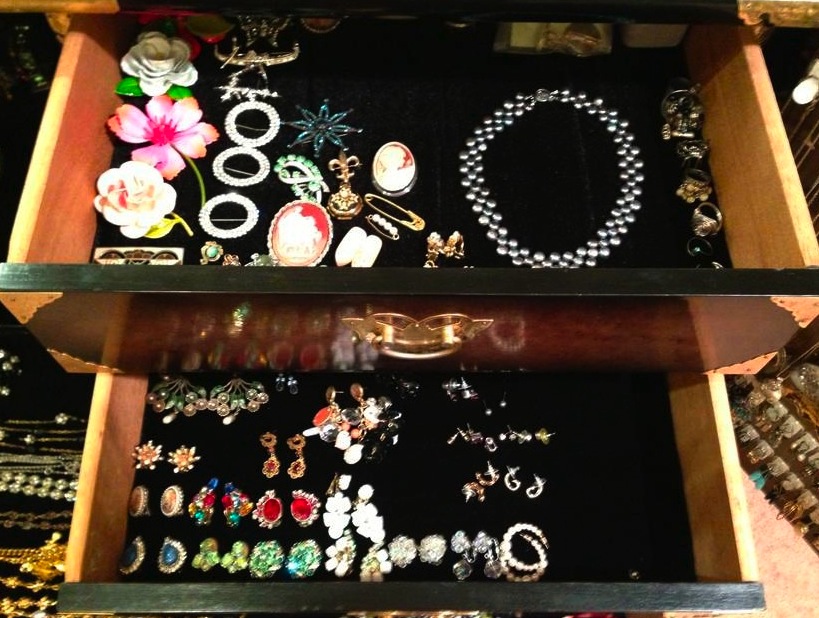
I tried to keep like items together, pins, earrings, rings, etc.
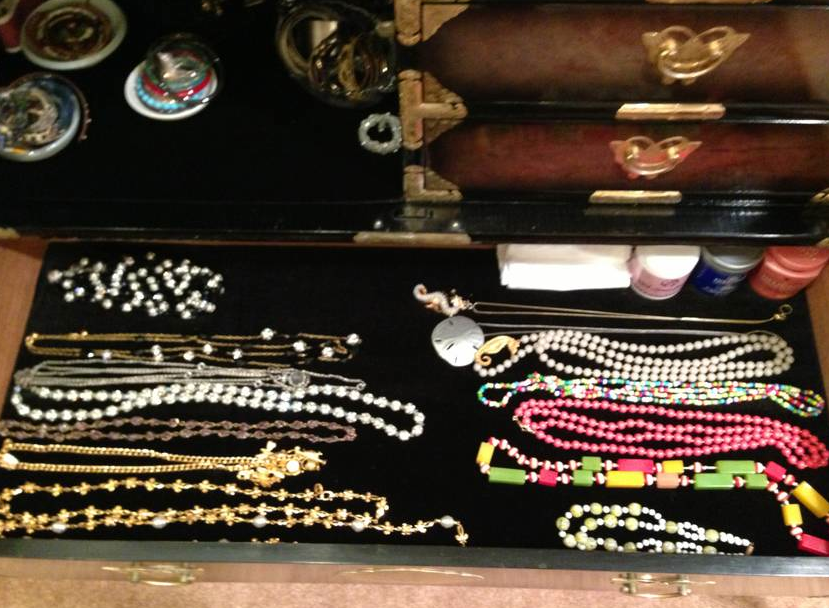
The wider, lower top drawer was perfect for extra long or heavy necklaces and I also used it to store jewelry cleaning supplies.
All in all, I was pleased with the outcome!
I ended up with two extra drawers, and lined those with velvet inserts as well, because I had enough left over materials. The extra drawers could be used for sweaters, delicates, etc. Either way, it’s bonus storage! 🙂
I spent just over 30 dollars for all of my supplies and it was worth every penny!
So, there you have it…your own custom jewelry case is just a trip to the Salvation Army and the fabric store away!
I’ll leave you with this:
“The only thing that separates us from the animals is our ability to accessorize” – Clairee Belcher (“Steel Magnolias”)
– Laura